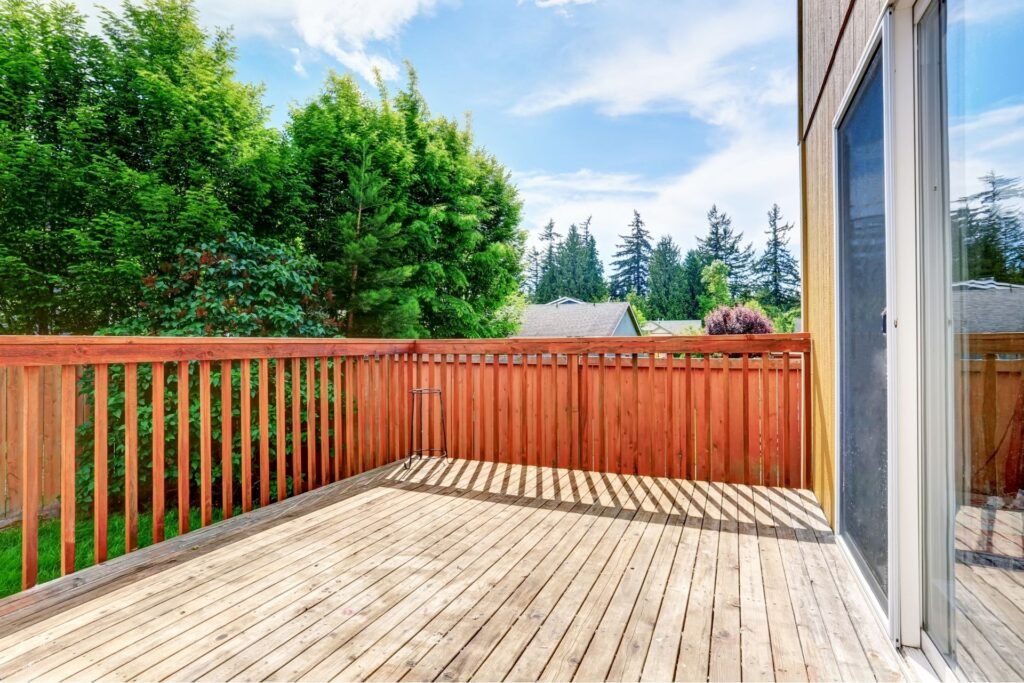
Welcome to your ultimate guide on how to remove paint from a deck in Australia, where we’ll walk you through the best methods to restore your deck to its natural beauty. Whether you’re dealing with peeling, cracking, or faded paint, maintaining your deck is crucial, especially in Australia’s harsh climate with intense UV exposure, rain, and humidity. In this article, you’ll discover effective techniques, from manual scraping and sanding to using pressure washers and chemical strippers, that will help you remove old paint safely and efficiently. With our step-by-step guidance, you’ll be well on your way to achieving a fresh, clean surface, ready for refinishing, ensuring your deck looks great and lasts longer.
To remove paint from a deck in Australia, start by preparing the area with safety gear and tools like a paint scraper, sander, or pressure washer. For manual removal, scrape off loose paint and sand the surface smooth. Alternatively, use a pressure washer for quicker results or apply an eco-friendly chemical paint stripper for stubborn areas. After paint removal, clean the deck thoroughly and inspect for any damage before refinishing with a UV-resistant stain or sealant.
- Safety First: Preparing For Paint Removal
- Manual Paint Removal (Scraping and Sanding)
- How To Remove Paint from A Deck Using A Pressure Washer
- Chemical Paint Strippers
- Combining Methods For Stubborn Areas
- Post-Removal Care: Prepping Your Deck For Refinishing
- FAQs: About How To Remove Paint From Deck Australia
- Conclusion
Safety First: Preparing For Paint Removal
When it comes to removing paint, safety must always be the top priority. Whether you’re dealing with old lead-based paints or newer, eco-friendly varieties, ensuring that you protect yourself, your surroundings, and the environment is critical. Below is a detailed guide to preparing for paint removal, keeping safety, efficiency, and environmental concerns at the forefront.
Essential Safety Gear for Paint Removal
Before you begin any paint removal project, it’s crucial to gather the right safety equipment. Paint removal can expose you to harmful chemicals, dust, and debris, so you’ll need to protect yourself accordingly. Here’s a list of essential safety gear to have on hand.
- Gloves: Always wear chemical-resistant gloves, especially when working with chemical paint strippers. They protect your hands from harsh substances and possible skin irritation.
- Safety Goggles: Eye protection is crucial. Safety goggles shield your eyes from chemical splashes, paint chips, and dust particles.
- Dust Masks or Respirators: Depending on the method of paint removal, you’ll likely generate dust and debris. If you’re sanding or scraping old paint, especially lead-based paint, a high-quality respirator or dust mask is necessary to prevent inhalation of toxic particles.
- Appropriate Clothing: Wear long sleeves and pants to protect your skin from splashes or dust exposure. It’s best to use clothing specifically designated for this type of work.
- Hearing Protection (if needed): If you’re using loud equipment like a heat gun or pressure washer, consider ear protection to prevent hearing damage.
Environmental Considerations
Australia, like many countries, enforces strict environmental regulations concerning chemical usage and waste disposal. Paint removal can be a significant source of pollution if not done responsibly. To minimize environmental impact, here are some guidelines to follow.
- Use Biodegradable Paint Removers: Whenever possible, opt for eco-friendly paint strippers that are biodegradable. These products tend to be less harmful to both the environment and your health.
- Proper Waste Disposal: Paint chips, especially those containing lead, must be disposed of in accordance with local regulations. Never allow paint debris to wash into storm drains or natural water systems. Instead, collect all debris in designated containers and take them to a hazardous waste facility.
- Minimize Chemical Use: For outdoor paint removal, ensure you’re working in an area where chemicals won’t contaminate the soil or groundwater. You may also want to consider mechanical methods, like sanding or pressure washing, which can reduce the need for chemicals.
Preparing Your Work Area
A well-prepared workspace not only increases efficiency but also helps maintain safety. Here’s how to get your area ready before you begin removing paint.
- Remove or Cover Furniture: If you’re working indoors, clear the area of any furniture or household items to avoid damage. For outdoor projects, cover nearby plants and landscaping to protect them from chemicals and debris.
- Ensure Proper Ventilation: Good ventilation is key, particularly in enclosed areas. Open windows and doors to allow fresh air to circulate. If you’re working indoors with chemical strippers, consider using fans to push fumes outdoors.
- Lay Drop Cloths: Cover floors or outdoor surfaces with heavy-duty drop cloths to catch falling paint chips and prevent damage to underlying surfaces.
- Seal Off the Area (if needed): If you’re removing paint indoors, it might be necessary to seal off rooms with plastic sheeting to prevent dust or fumes from spreading to other parts of the house.
Comprehensive Materials Checklist
To remove paint safely and effectively, having the right tools and materials on hand is essential. Here’s a comprehensive checklist to ensure you’re fully prepared.
- Paint Scraper: A good-quality paint scraper is indispensable for manually removing peeling or flaking paint.
- Wire Brush: Ideal for getting into crevices or rough surfaces where a paint scraper may not reach.
- Heat Gun: A heat gun softens paint, making it easier to scrape away. Be cautious not to overheat the area, as this can damage underlying materials.
- Pressure Washer (for outdoor use): A pressure washer can blast away paint from outdoor surfaces like concrete or wood siding. Ensure you’re using the correct pressure setting to avoid damaging the surface.
- Chemical Paint Stripper: Chemical strippers are ideal for removing multiple layers of paint or for detailed work. Be sure to select an eco-friendly option if possible.
- Sandpaper or Electric Sander: Sanding helps to smooth surfaces after scraping and removes any lingering paint residue.
- Putty Knife: Useful for detailed work or removing stubborn paint in small areas.
- Plastic Sheeting and Drop Cloths: Protect surfaces, plants, and furniture from debris and paint removal chemicals.
- Buckets and Brushes: You’ll need these for cleaning tools and applying paint remover, if necessary.
By following these safety guidelines, preparing your workspace correctly, and gathering the right materials, you can ensure a safe and successful paint removal project. Prioritizing safety and environmental responsibility not only protects you but also helps preserve the surroundings for future generations.

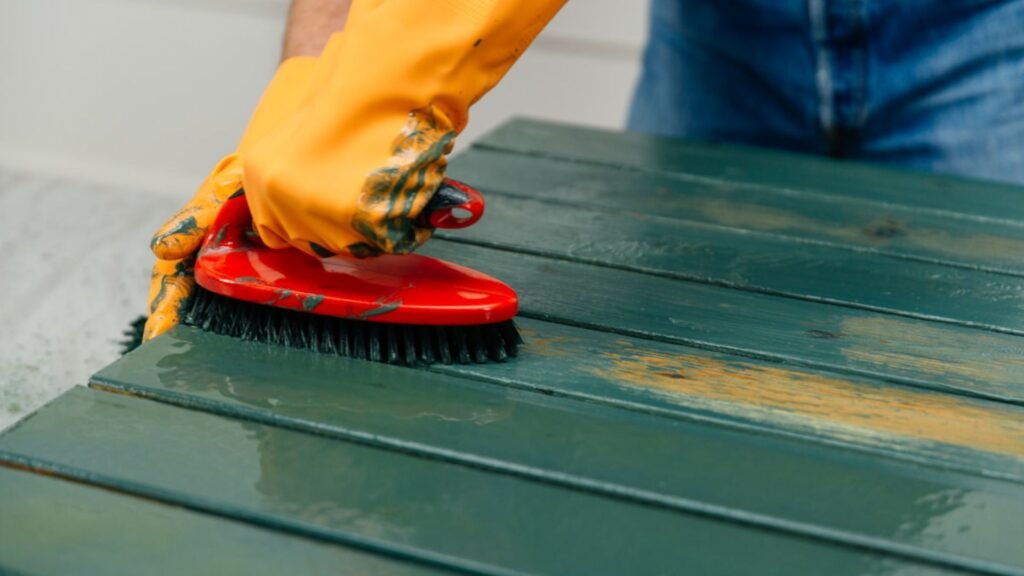
Manual Paint Removal (Scraping and Sanding)
Manual paint removal, through scraping and sanding, is one of the most accessible and budget-friendly methods for restoring your deck. However, it’s essential to acknowledge that this approach can be labor-intensive. It is perfect for homeowners looking for a DIY project without relying on heavy-duty equipment or harsh chemicals.
- Scraping: Is the first step in this process. To begin, use a paint scraper to tackle loose or flaking paint, focusing on smaller areas at a time. It’s important to apply consistent pressure while scraping, but be careful not to gouge or damage the wood underneath. A smooth, steady hand ensures you only remove the unwanted layers of paint without harming the deck surface.
- Sanding: Which is crucial for smoothing the wood after scraping and preparing it for repainting or sealing. For smaller areas, a hand sander works well, but for larger decks, a power sander will save time and energy. Start with a coarse sandpaper grit to remove any remaining paint, then switch to a finer grit to create a smooth finish. Selecting the right sandpaper is key: 60-80 grit for initial sanding and 120-150 grit for finishing touches will give the best results.
This method of paint removal offers several advantages. It’s cost-effective since it requires minimal tools, and it avoids the use of harsh chemicals, making it a more environmentally friendly option. However, it does have its drawbacks. The process can be time-consuming and physically demanding, especially for larger deck areas.
For those in Australia, it’s wise to undertake scraping and sanding on cooler days to avoid overheating during the hard work. It’s also recommended to take breaks during the hottest part of the day to prevent exhaustion and ensure a more comfortable working experience.
Manual paint removal through scraping and sanding is a practical, budget-conscious approach that provides effective results for deck restoration, as long as you’re prepared to invest some time and effort into the process.

How To Remove Paint from A Deck Using A Pressure Washer
When it comes to removing paint from a large deck, pressure washing can be a highly effective and time-saving method. Unlike manual methods like scraping or sanding, using a pressure washer allows you to cover larger areas quickly while still delivering powerful results. However, using this tool requires precision and the correct settings to avoid damaging the wood. In this guide, we’ll walk you through how to remove paint from a deck using a pressure washer, providing expert tips to ensure success.
Why Pressure Washing is a Great Option for Large Decks
Pressure washing is particularly suited for larger decks because of its efficiency. Rather than spending hours sanding or scraping, a pressure washer can strip off old paint in a fraction of the time. For homeowners with expansive outdoor spaces, this method offers a practical solution, combining speed and effectiveness.
Using a Pressure Washer to Remove Paint
Choosing the Right Pressure Washer
One of the most important aspects of using a pressure washer for deck paint removal is selecting the right equipment. Pressure washers come in a range of power settings, typically measured in PSI (pounds per square inch). For paint removal on wooden surfaces like decks, you’ll want a pressure washer with a setting between 2000 and 3000 PSI.
- 2000 PSI: is usually sufficient for lighter paint removal and is less likely to cause any damage to the wood.
- 3000 PSI: can be more effective for tougher jobs but requires more careful handling to avoid gouging or splintering the deck boards.
If you’re unsure, start with a lower PSI and gradually increase it as needed to avoid damaging the wood.
Proper Technique for Pressure Washing
To achieve the best results, it’s important to follow the correct technique when using a pressure washer on your deck. Here are the steps to ensure a smooth process:
- Maintain the Right Distance: Hold the spray nozzle about 12 to 18 inches away from the deck surface. This distance helps prevent the water pressure from damaging the wood while still removing the paint effectively.
- Adjust the Nozzle Settings: Most pressure washers come with adjustable nozzles, which control the width and concentration of the spray. For paint removal, a 25-degree nozzle is recommended. It provides enough pressure to lift the paint without being too harsh on the wood surface.
- Spray in Even Strokes: Move the nozzle in long, sweeping strokes along the grain of the wood. Avoid holding the spray in one spot for too long, as this can erode the surface. Instead, keep a steady hand and work systematically across the entire deck.
Begin in an inconspicuous area to get a feel for how the wood responds to the pressure, and adjust your technique if necessary.
Inspecting and Finishing
After pressure washing the entire deck, it’s crucial to inspect your work. While pressure washing is highly effective, there may still be small areas where paint remains stubbornly stuck to the wood. These spots will need to be addressed manually, either through sanding or with a paint scraper.
- Manual Removal of Leftover Paint: If you notice any paint that didn’t come off, use a paint scraper or fine sandpaper to remove the remaining residue. This ensures the deck is fully prepped for any further refinishing or repainting.
Pros & Cons of Pressure Washing for Paint Removal
As with any method, there are both benefits and drawbacks to using a pressure washer to remove paint from your deck.
Pros
- Efficiency: A pressure washer can cover large areas in a short amount of time, making it ideal for expansive decks.
- Powerful Cleaning: The high-pressure water stream effectively removes paint, dirt, and grime from wood surfaces.
- Less Physical Effort: Compared to sanding or scraping by hand, pressure washing is much less labor-intensive.
Cons
- Risk of Damage: If not done carefully, a pressure washer can gouge or splinter wood, especially if the PSI is too high or the nozzle is held too close to the surface.
- Water Waste: Pressure washing uses a significant amount of water, which could be a concern in areas with water restrictions.
- Incomplete Removal: Some areas may still require manual touch-ups, especially if the paint is deeply embedded in the wood grain.
Water Usage Restrictions
In Australia, many regions experience water shortages and have strict regulations on water usage, especially during drought seasons. Before using a pressure washer, it’s essential to check your local water restrictions to ensure you’re in compliance with any rules.
- Alternatives During Water Restrictions: If pressure washing is not allowed due to water usage concerns, consider using a chemical paint remover combined with hand tools as an alternative method.
- Environmentally Conscious Pressure Washers: Some pressure washers are designed to be more water-efficient, using less water per minute while still delivering the pressure needed to remove paint. These can be a good option in areas where water conservation is a priority.
Pressure washing can be a fast and effective way to remove paint from a large deck, but it’s important to follow the right steps to protect your wood and ensure a thorough job. With the correct pressure washer settings, proper technique, and attention to detail, you’ll have your deck ready for refinishing in no time. Always remember to consider local regulations, particularly in places like Australia where water usage is a key concern. If done correctly, pressure washing can save you both time and effort, making it a worthwhile option for large-scale deck paint removal projects.

Chemical Paint Strippers
Chemical paint strippers are one of the most effective methods for removing stubborn layers of paint from your deck, especially when other techniques like scraping or pressure washing fall short. This method works by breaking down the bond between the paint and the wood, making it easier to remove multiple layers of old, peeling paint. Chemical strippers come in a variety of formulations, including eco-friendly options that are better suited for use around plants and animals, making them a powerful yet versatile option for Australian homeowners.
Step-by-Step Process for Using Chemical Paint Strippers
Choosing the Right Paint Stripper
Before getting started, selecting the appropriate chemical paint stripper for your deck is crucial. In Australia, there are several types of strippers available, but biodegradable and low-VOC (volatile organic compounds) products are the best options if you’re environmentally conscious. These eco-friendly alternatives, such as soy-based or citrus-based strippers, offer effective results without the harmful side effects of traditional, harsher chemicals.
- Biodegradable Paint Strippers: These are designed to break down naturally in the environment, reducing any impact on plants and animals.
- Low-VOC Strippers: These release fewer volatile organic compounds into the air, making them safer for both the environment and your health.
When shopping, look for brands that are specifically labeled as safe for outdoor use and, if possible, certified for low environmental impact.
Application of the Paint Stripper
Once you’ve chosen the right product, it’s time to apply the stripper. This is a critical step where even coverage is key to ensuring the stripper penetrates all layers of paint effectively.
- Step 1: Begin by putting on protective gear, including gloves, safety goggles, and a mask, especially if you’re working with strong chemicals.
- Step 2: Use a brush or roller to apply a thick, even layer of the paint stripper to the deck. Make sure to cover all painted areas generously.
- Step 3: Follow the manufacturer’s instructions for how long to leave the product on. This can range from 15 minutes to several hours depending on the thickness of the paint and the type of stripper used. Don’t rush this step—letting the stripper sit for the recommended time is crucial to ensuring that the paint softens completely for easy removal.
Scraping Off the Paint
Once the paint stripper has had time to work, the paint will begin to bubble and lift from the surface. Now, it’s time to remove it.
- Step 1: Use a paint scraper or putty knife to carefully scrape away the softened paint. Start in a small, inconspicuous area to get a feel for the process, then continue over the entire deck surface.
- Step 2: Apply consistent, even pressure to avoid damaging the wood beneath the paint. If any areas prove particularly stubborn, reapply the stripper and allow it to sit for a few more minutes before trying again.
Neutralizing and Cleaning the Deck
After removing the paint, there’s one more essential step: neutralizing any remaining chemical residue. This is particularly important because leftover chemicals can interfere with the new finish you’ll apply to the deck.
- Step 1: Use a neutralizing agent recommended by the paint stripper manufacturer. If the stripper is water-based, soap and water may be enough to neutralize the chemicals.
- Step 2: Thoroughly scrub the deck with soap and water, making sure to rinse well to remove any residue.
- Step 3: Allow the deck to dry completely before proceeding with any refinishing or staining. This ensures that the wood is fully prepared for the next stage of restoration.
Pros & Cons of Using Chemical Paint Strippers
Pros
- Highly Effective: Chemical paint strippers are particularly useful for removing thick layers of paint or varnish, especially when multiple layers have built up over time.
- Less Labor-Intensive: Compared to manual methods like scraping and sanding, chemical strippers can save a significant amount of time and effort.
- Versatile: They work on various surfaces and types of paint, making them a go-to solution for difficult projects.
Cons
- Cost: Chemical paint strippers, particularly eco-friendly ones, can be more expensive than manual tools or pressure washing.
- Environmental Impact: If not used carefully, some chemical strippers can pose risks to the environment. It’s important to choose eco-friendly products and follow proper disposal guidelines to minimize harm.
- Safety Concerns: Even biodegradable strippers can be hazardous to your skin, eyes, or lungs if not handled properly. Always wear protective gear and work in a well-ventilated area.
Environmentally Friendly Alternatives
For those seeking greener alternatives, there are several eco-friendly paint strippers available in Australia that are safe to use around your home, garden, and pets. These products are biodegradable, meaning they won’t harm the environment or your outdoor space. Popular eco-friendly options include.
- Soy-Based Strippers: These use natural soy compounds to break down paint without harsh chemicals.
- Citrus-Based Strippers: Citrus-based products are known for being effective yet gentle, and they have the added benefit of a pleasant scent.
- Water-Based Strippers: These often have fewer toxic ingredients and are designed to be safer for both the user and the environment.
When using eco-friendly strippers, keep in mind that they may take longer to work than traditional chemical strippers, but they offer a much safer option for you and your surroundings.
Using chemical paint strippers can be a powerful and efficient way to remove stubborn paint layers from your deck. While this method does require some precautions, particularly with safety and environmental considerations, it is an effective approach that can save you time and effort. By selecting the right product, applying it correctly, and following through with thorough cleaning and neutralization, you’ll be able to restore your deck to its natural beauty. For eco-conscious homeowners, there are plenty of safe alternatives available that minimize environmental harm without compromising on effectiveness.

Combining Methods For Stubborn Areas
When One Method Isn’t Enough
There are times when simply relying on one paint removal technique just won’t cut it literally! Some areas of your deck may have especially stubborn paint, and using a single method might not get the job done. Whether it’s due to multiple layers of old paint, weathering, or tricky spots, certain sections may need a combination of methods to effectively remove the paint. The good news is, blending different approaches can help you overcome those challenges and get your deck looking fresh and ready for refinishing.
Mixing Sanding, Stripping, and Scraping
For areas where paint refuses to budge, consider combining sanding and chemical stripping. This can be particularly effective when dealing with thick, old paint layers. Start by applying a chemical stripper to loosen the paint. Once it softens, use a sander to smooth out the surface and eliminate any remaining paint. This two-step process works well on larger, flatter surfaces but can also be helpful in areas where the paint has penetrated deeper into the wood grain.
Another effective combination is using a pressure washer followed by manual scraping. Pressure washing can remove loose, peeling paint and clean the deck surface. However, for more delicate areas, like edges or corners, manual scraping with a paint scraper or putty knife may be necessary. This method ensures you can work carefully around intricate spots without damaging the wood beneath the paint.
Tips for Best Results in Hard-to-Reach Areas
Corners, cracks, and edges can be particularly frustrating when removing paint, but a few practical tips can make the job easier. For these tricky spots, use a smaller, handheld tool like a wire brush or a narrow scraper to access hard-to-reach areas. A multi-tool with a scraper attachment can also be handy for getting into tight corners without gouging the wood.
Additionally, don’t rush the process. Allow any chemical strippers to work for the recommended time before you start scraping, and be patient with manual methods. You might also find that alternating between different tools, like switching from sanding to scraping in stubborn spots, yields the best results.
By combining methods and using the right tools, even the most difficult areas of your deck can be stripped of old paint effectively, leaving you with a smooth, clean surface ready for staining or repainting.

Post-Removal Care: Prepping Your Deck For Refinishing
After the hard work of stripping away old paint, your deck is ready for the next stage: thorough cleaning and refinishing. This step is crucial to ensure that the new finish adheres well and lasts for years. Let’s break down the process to help you prep your deck for its new look.
Cleaning the Deck
Once all the paint has been removed, the first and most important task is cleaning the deck properly. This step eliminates any leftover debris, paint chips, or chemicals that may have settled into the wood. Start by sweeping away loose dirt and debris. For a deeper clean, use a deck cleaner designed to remove grime and mold. A power washer can be a helpful tool, but remember to use it on a lower setting to avoid damaging the wood. Rinsing thoroughly is key to making sure no residue remains on the surface, which could prevent your new finish from bonding properly. Allow the deck to dry completely before moving on to the next step moisture trapped in the wood can cause future problems like mold growth or poor adhesion of the finish.
Inspecting for Damage
Before you start sanding or refinishing, take a moment to thoroughly inspect your deck for any signs of damage. Look for cracks, splinters, loose boards, or even rot, especially around areas prone to moisture, like near the house or underneath plant pots. Identifying these issues now will save you headaches later. If you find any damage, address it before proceeding. For small cracks, wood filler might do the job, but for more serious rot or structural problems, replacing sections of wood may be necessary. Remember, refinishing your deck will seal it, so any existing damage could worsen if not fixed upfront.
Sanding for a Smooth Finish
Now that your deck is clean and any damage has been addressed, it’s time to sand the surface. Sanding helps smooth out any rough patches left behind from the paint removal process and prepares the wood to better absorb the new stain or paint. Use a fine-grit sandpaper (around 120-150 grit) for this final pass. Sanding the deck evenly will help avoid unsightly blotches when you apply the new finish. Be mindful not to oversand, as this can close off the wood grain, making it harder for the finish to penetrate properly. A light, consistent sanding is all that’s needed to create a smooth surface. After sanding, sweep or vacuum away the dust, and give the deck a quick wipe-down to remove any lingering particles.
Choosing the Right Finish for Australian Climates
The Australian climate can be harsh on outdoor wood, especially decks that are exposed to constant sun, rain, and temperature fluctuations. When choosing a finish, you need to consider your specific climate conditions. UV protection is one of the most important features for a deck finish in Australia, as the strong sun can cause wood to fade and crack over time. When it comes to selecting a finish, there are two main types: oil-based and water-based.
- Oil-based finishes: Penetrate deeply into the wood, providing excellent protection and a rich, natural appearance. They are particularly effective in high-traffic areas, as they offer great durability and water resistance. However, oil-based finishes take longer to dry and require more maintenance in the long run.
- Water-based finishes: Dry faster and are easier to clean up. They form a protective film over the surface of the wood and are generally more eco-friendly. These finishes are also less prone to yellowing over time, making them ideal for lighter-colored woods. However, water-based finishes may not penetrate as deeply as oil-based ones, which could result in slightly less protection.
For Australian conditions, many homeowners prefer using oil-based finishes due to their longevity and deep protective qualities, especially in sun-exposed areas. However, water-based finishes can be a great choice for those looking for faster application and drying times. Consider your deck’s exposure to the elements, the look you’re aiming for, and how much maintenance you’re willing to undertake when making your decision. Prepping your deck after paint removal is an essential step to ensuring the longevity and appearance of your new finish. Proper cleaning, damage inspection, light sanding, and selecting the right finish are all crucial tasks that will help you achieve a stunning, durable deck that can withstand the unique challenges of the Australian climate. Taking the time to do it right will make your outdoor space look beautiful and stay protected for years to come. The Australian climate can be harsh on outdoor wood, especially decks that are exposed to constant sun, rain, and temperature fluctuations. When choosing a finish, you need to consider your specific climate conditions. UV protection is one of the most important features for a deck finish in Australia, as the strong sun can cause wood to fade and crack over time. For expert advice on selecting the best deck finish for Australian conditions, you can visit Australian Deck Finish Solutions.

FAQs: About How To Remove Paint From Deck Australia
Conclusion
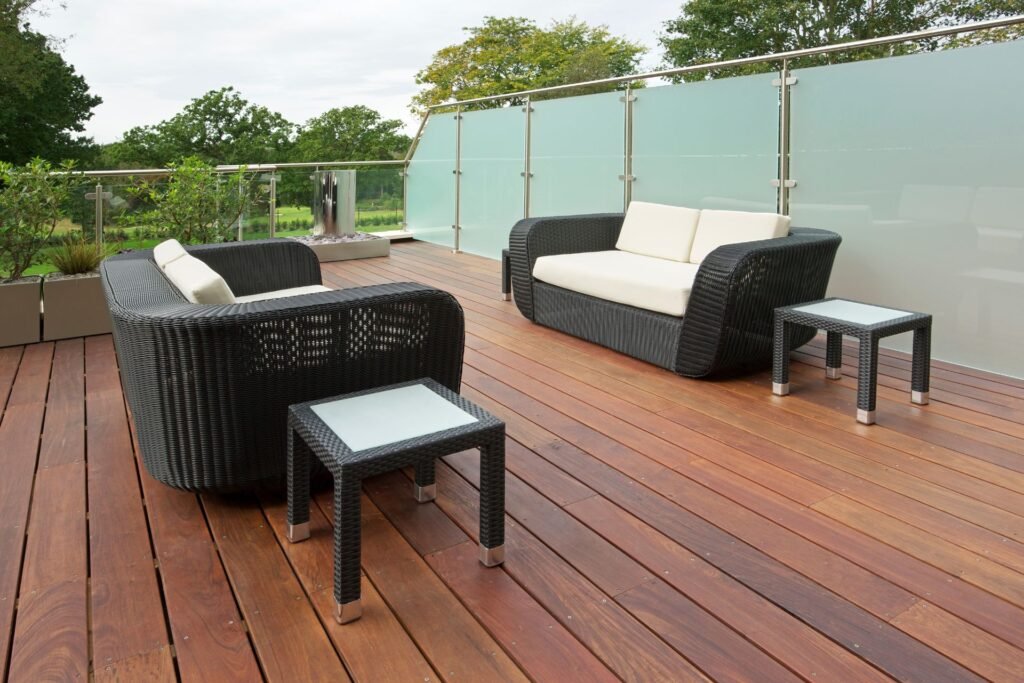
Refinishing your deck is a rewarding process that can truly transform your outdoor space. Whether you choose manual scraping, pressure washing, or chemical stripping, each method offers distinct advantages. Manual scraping allows for detailed precision, pressure washing provides an efficient, deep clean, and chemical stripping works effectively on tough, stubborn stains. While restoring your deck may require time and effort, the end result of a beautifully refinished deck is well worth the investment. Picture yourself relaxing on a fresh, inviting deck, perfectly suited to the Australian outdoor lifestyle, where you can enjoy barbecues, family gatherings, or peaceful evenings. Remember, the hard work will pay off with a space that’s not only functional but aesthetically pleasing. We encourage you to share your deck restoration journey, ask any questions, or seek further advice in the comments below. Your experience might inspire others who are ready to take on the same challenge.
About the Author:
Mike Veail is a recognized digital marketing expert with over 6 years of experience in helping tradespeople and small businesses thrive online. A former quantity surveyor, Mike combines deep industry knowledge with hands-on expertise in SEO and Google Ads. His marketing strategies are tailored to the specific needs of the trades sector, helping businesses increase visibility and generate more leads through proven, ethical methods.
Mike has successfully partnered with numerous companies, establishing a track record of delivering measurable results. His work has been featured across various platforms that showcase his expertise in lead generation and online marketing for the trades sector.
Learn more about Mike's experience and services at https://theleadguy.online or follow him on social media: