Welcome to our comprehensive guide on how to stain a deck in Australia. Whether you’re looking to refresh the appearance of your outdoor space or protect your deck from the harsh Australian weather, staining is a crucial step in deck maintenance. In this blog post, we’ll walk you through everything you need to know, from choosing the right stain and preparing your deck, to applying the stain and ensuring it lasts. Our easy-to-follow instructions and expert tips will help you achieve a professional finish, ensuring your deck not only looks great but also stands up to the elements for years to come. Let’s dive in and transform your deck into a stunning and durable outdoor haven.
To stain a deck in Australia, start by thoroughly cleaning and repairing your deck. Choose the right type of stain based on your wood and climate preferences. Apply the stain evenly using brushes or rollers, ensuring you cover all surfaces, including corners and edges. Allow the stain to dry completely before using the deck, usually 24-48 hours. Regular maintenance, including reapplying the stain as needed, will keep your deck looking great and protected from the elements.
Understanding Deck Staining
Definition and Purpose of Deck Staining
Deck staining is a crucial process in maintaining and enhancing the longevity of your outdoor wooden structures. Staining involves applying a specially formulated product to the wood, which penetrates the surface to provide protection and improve appearance. The primary purpose of deck staining is to protect the wood from environmental elements such as moisture, sunlight, and temperature fluctuations, which can cause significant damage over time.
Differences Between Staining and Painting a Deck
While both staining and painting are methods used to protect and beautify wooden decks, there are key differences between the two.
1. Penetration vs. Surface Coverage: Stains penetrate the wood, providing deep protection and enhancing the natural grain. Paint, on the other hand, creates a layer on top of the wood, offering a different type of protection.
2. Maintenance: Stained decks tend to require less maintenance compared to painted ones. Paint is prone to peeling and chipping, especially in high-traffic areas, whereas stain gradually fades over time, making touch-ups easier and less frequent.
3. Aesthetics: Stains offer a more natural look, showcasing the wood’s inherent beauty and grain patterns. Paints provide a uniform, opaque finish, which can be beneficial if you want to completely change the deck’s color or cover imperfections.
Benefits of Staining a Deck
Staining your deck comes with several benefits, which include.
1. Protection from Weather: Stains create a barrier that repels water, preventing moisture from penetrating the wood. This is crucial in avoiding issues like rot, mold, and mildew, which can weaken the structure and reduce its lifespan.
2. UV Ray Protection: Over time, sunlight can cause wood to fade, crack, and become brittle. Staining provides UV protection, preserving the deck’s color and integrity by minimizing the impact of the sun’s harsh rays.
3. Aesthetic Appeal: A well-stained deck enhances the overall appearance of your outdoor space. Stains are available in a variety of shades and tints, allowing you to choose a color that complements your home’s exterior and personal style. The enhanced grain and texture of a stained deck add a touch of elegance and natural beauty.
4. Cost-Effective Maintenance: Regularly staining your deck is a cost-effective way to maintain its appearance and durability. It can prevent the need for more extensive repairs or replacements in the future, saving you time and money in the long run.
Understanding the importance and benefits of deck staining can help you make informed decisions about how to maintain your outdoor wooden structures. By choosing the right stain and applying it correctly, you can ensure your deck remains beautiful and functional for years to come.

Choosing The Right Stain For Your Deck
Selecting the perfect stain for your deck is essential to both its appearance and longevity. A well-chosen stain not only enhances the natural beauty of the wood but also protects it from the harsh Australian climate. Here’s a comprehensive guide to help you make the right decision.
Types of Deck Stains
When it comes to deck stains, there are three main types: transparent, semi-transparent, and solid. Each type offers different levels of protection and aesthetic appeal, so understanding their characteristics can help you choose the best one for your needs.
1. Transparent Stains: Transparent stains are ideal if you want to showcase the natural grain and texture of the wood. They provide a subtle tint that enhances the wood’s natural color while offering minimal UV protection. These stains are best suited for new or high-quality wood where you want to highlight the beauty of the material.
2. Semi-Transparent Stains: Semi-transparent stains offer a balance between natural appearance and protection. They add more color than transparent stains while still allowing the wood grain to show through. These stains provide moderate UV protection and are suitable for older decks that may need a bit of rejuvenation.
3. Solid Stains: Solid stains provide the most coverage and are perfect for decks with older or more weathered wood. They completely cover the wood grain, offering the highest level of protection against UV rays and moisture. Solid stains are available in a wide range of colors, allowing you to customize the look of your deck.
Factors to Consider When Selecting a Stain
Choosing the right stain involves considering several factors to ensure it meets your deck’s specific needs.
1. Wood Type: Different wood types react differently to stains. For instance, hardwoods like jarrah or merbau might require a different stain than softer woods like pine. It’s important to select a stain that complements the natural characteristics of your deck’s wood.
2. Color Preference: The color of the stain can significantly impact the overall look of your deck. Consider whether you want to enhance the natural wood color, add a hint of tint, or completely change the color. Remember that transparent and semi-transparent stains will highlight the wood’s natural hue, while solid stains offer more color options.
3. Climate Considerations in Australia: Australia’s diverse climate can affect how well a stain performs. In hot and sunny regions, UV protection is crucial to prevent fading and damage. In areas with high humidity or frequent rain, moisture resistance is key to avoiding mold and mildew growth. Choose a stain that offers the right level of protection for your local climate conditions.
Popular Brands and Products Available in Australia
Australia has a wide range of deck stain brands and products to choose from. Here are some popular options that have received positive reviews from homeowners and professionals alike.
1. Cabot’s: Cabot’s offers a variety of deck stains suitable for different types of wood and finishes. Their products are known for their durability and ease of application.
2. Intergrain: Intergrain is a trusted brand that provides high-performance stains designed to withstand Australia’s harsh climate. Their products offer excellent UV protection and long-lasting results.
3. Wattyl: Wattyl deck stains are known for their rich colors and superior protection. They offer a range of stains that cater to different preferences and wood types.
4. Feast Watson: Feast Watson specializes in premium wood finishes that enhance and protect your deck. Their stains are formulated to provide excellent coverage and durability.
5. Sikkens: Sikkens deck stains are renowned for their quality and longevity. They offer a range of products that deliver outstanding protection and a beautiful finish.
By understanding the different types of deck stains, considering essential factors like wood type and climate, and exploring popular brands available in Australia, you can make an informed decision that will keep your deck looking stunning and protected for years to come.
Preparing Your Deck For Staining
Cleaning the Deck
Importance of Cleaning Before Staining
Cleaning your deck is a crucial first step in the staining process. Dirt, grime, and mildew can prevent the stain from penetrating the wood properly, leading to an uneven finish and reduced longevity. A clean deck ensures the stain adheres uniformly, enhancing its appearance and durability.
Step-by-Step Guide to Cleaning Your Deck
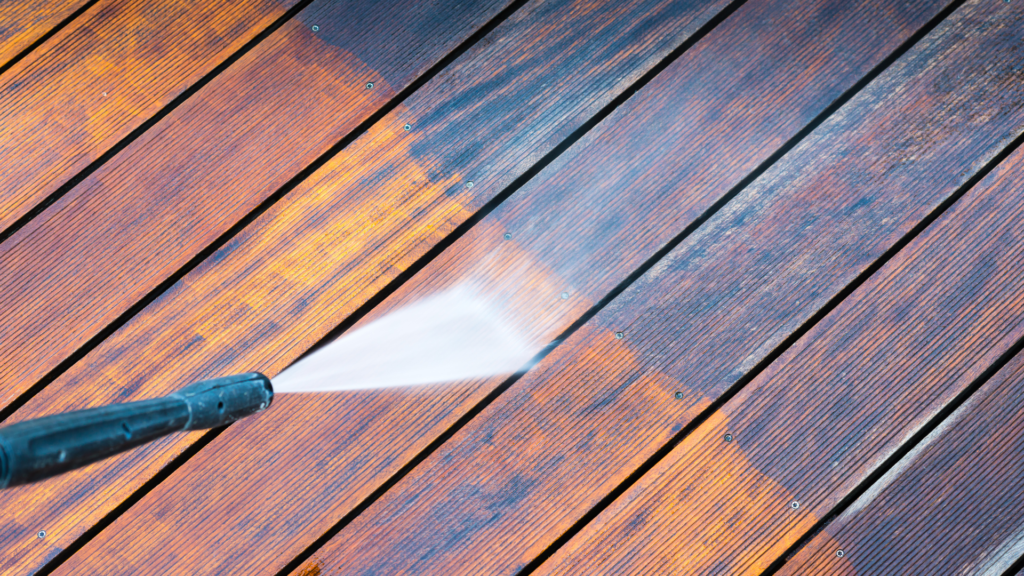
1. Sweeping: Begin by thoroughly sweeping the deck to remove loose dirt and debris. Pay special attention to corners and spaces between the boards where debris tends to accumulate.
2. Washing: After sweeping, wash the deck with a hose or a pressure washer on a low setting to remove embedded dirt and grime. If using a pressure washer, maintain a safe distance to avoid damaging the wood.
3. Removing Stains: For stubborn stains or mildew, use a specialized deck cleaner. Apply the cleaner according to the manufacturer’s instructions, typically letting it sit for a few minutes before scrubbing with a stiff-bristled brush.
Recommended Cleaning Products
Choosing the right cleaning products is essential for effective deck preparation. Here are some recommended options.
- Simple Green Deck and Fence Cleaner: An environmentally friendly option that effectively removes dirt and mildew.
- Wolman DeckBrite: A powder concentrate that mixes with water to create a powerful cleaning solution.
- Olympic Premium Deck Cleaner: Known for its ability to clean and brighten the wood, preparing it for staining.
Repairing and Sanding the Deck
Identifying and Fixing Any Damage
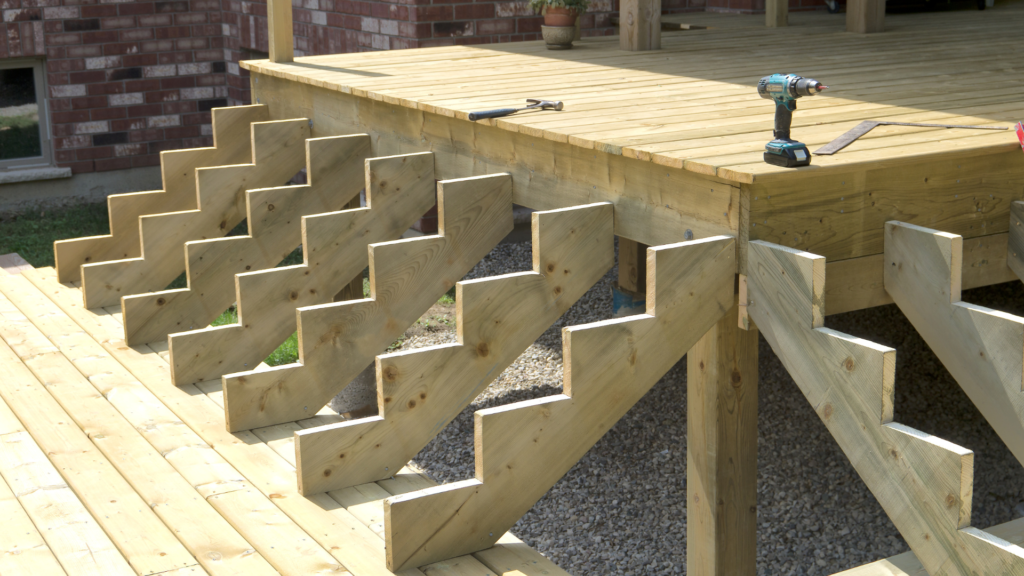
Before sanding, inspect your deck for any signs of damage, such as loose nails, splinters, or cracks. Addressing these issues is vital for the longevity and appearance of your deck.
1. Loose Nails: Hammer in any loose nails or replace them with deck screws for a more secure hold.
2. Splinters: Remove any splinters with a chisel or sandpaper to prevent injury and ensure a smooth surface.
3. Cracks: Fill small cracks with a wood filler suitable for exterior use. For larger cracks, consider replacing the affected boards.
Guide to Sanding the Deck for Smoothness
Sanding your deck smooths out rough spots and opens up the wood pores, allowing the stain to penetrate more deeply.
1. Choosing the Right Sandpaper: Start with a coarse grit (60-80) to remove old stain and rough patches, then finish with a finer grit (120-150) for a smooth surface.
2. Using a Sander: For larger areas, a power sander will make the job quicker and more efficient. For edges and corners, a sanding block or detail sander works best.
3. Technique: Sand along the grain of the wood to avoid scratches. Ensure even coverage to prepare the wood adequately for staining.
Tools and Materials Needed for Repairs and Sanding
- Hammer and Deck Screws: For securing loose nails and screws.
- Chisel and Sandpaper: To remove splinters and smooth out rough patches.
- Wood Filler: To fill in cracks and gaps.
- Power Sander and Sanding Blocks: For efficient and thorough sanding.
- Safety Gear: Including gloves, safety glasses, and a dust mask to protect yourself during the process.
By meticulously cleaning, repairing, and sanding your deck, you set the stage for a successful staining project. These preparatory steps ensure the stain adheres properly, providing a beautiful and long-lasting finish.

How To Stain A Deck: Step-By-Step Guide
Staining a deck not only enhances its appearance but also protects it from the elements. Here’s a comprehensive guide to help you achieve a professional-looking finish.
Gathering Materials and Tools
Before you begin staining your deck, it’s essential to gather all the necessary materials and tools. Having everything at hand will make the process smoother and more efficient.
Materials and Tools Needed
1. Stain: Choose a high-quality deck stain that suits your wood type and desired finish. Oil-based stains penetrate deeply and offer excellent protection, while water-based stains are easier to clean up and have lower VOCs.
2. Brushes and Rollers: Use a high-quality brush for cutting in edges and a roller for large, flat surfaces. A roller with a long handle will save your back and make the job quicker.
3. Painter’s Tape: This is useful for protecting areas you don’t want to stain, such as adjoining walls or railings.
4. Drop Cloths: Protect your surrounding area from drips and spills by laying down drop cloths. This will save you from a tedious clean-up later.
5. Safety Equipment: Wear gloves to protect your hands, a mask to avoid inhaling fumes, and protective eyewear to shield your eyes from splashes.
Staining Process
With your materials and tools ready, follow these steps to stain your deck effectively.
Step-by-Step Instructions
1. Preparation
- Clean the Deck: Ensure the deck is free from dirt, debris, and mildew. Use a deck cleaner or a mixture of water and mild detergent. Scrub with a stiff brush and rinse thoroughly. Allow the deck to dry completely before staining.
- Sand the Surface: Lightly sand the deck to remove any rough spots or previous finishes. This helps the stain adhere better. Use medium-grit sandpaper and sand in the direction of the wood grain.
- Protect Surrounding Areas: Use painter’s tape to cover areas you don’t want to stain. Lay down drop cloths to catch any drips.
2. Applying the Stain
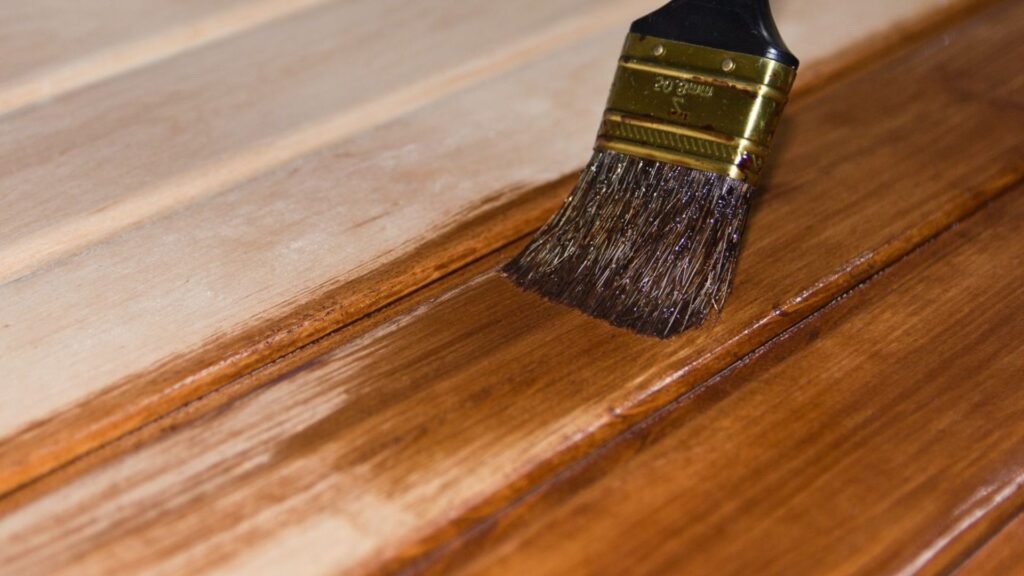
- Start with Edges and Corners: Use a brush to apply stain to the edges, corners, and other hard-to-reach areas. This ensures these areas are adequately covered and prevents overlapping marks from the roller.
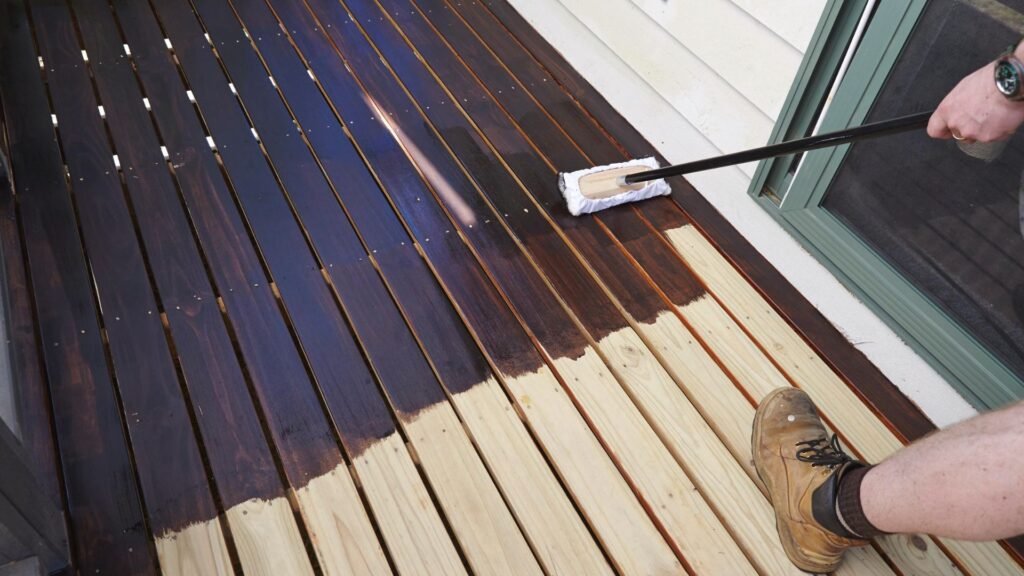
- Roller Application: Use a roller to apply the stain to the main deck surface. Work in small sections, applying a thin, even coat. Roll in the direction of the wood grain to avoid lap marks.
- Blend with Brush: After rolling, use a brush to blend the stain into the wood, especially between the boards. This helps to ensure an even finish and avoids puddles of stain.
3. Finishing Touches
- Handle Drips and Runs: Check for any drips or runs and smooth them out immediately with a brush. Uneven application can lead to blotchy areas once the stain dries.
- Allow to Dry: Follow the manufacturer’s instructions for drying time. Avoid foot traffic and keep the deck free from moisture until the stain is fully cured.
- Second Coat: If a deeper color or additional protection is desired, apply a second coat after the first has dried. This can enhance durability and aesthetic appeal.
Tips for Success
- Test First: Test the stain on a small, inconspicuous area to ensure it meets your expectations before applying it to the entire deck.
- Weather Conditions: Choose a day with mild, dry weather. Avoid staining in direct sunlight or if rain is forecasted within 24 hours.
- Maintenance: Regularly clean and reapply stain as needed to keep your deck looking its best and to prolong its lifespan.
By following these steps, you can achieve a beautifully stained deck that enhances your outdoor space and protects your investment for years to come.

Drying And Curing Time
When staining your deck, understanding the drying and curing times is crucial to achieving a long-lasting and beautiful finish. These times can vary depending on the type of stain used and the prevailing weather conditions. Here, we’ll break down everything you need to know about drying and curing times, how to protect your deck during this period, and tips for determining when your deck is ready for use.
Explanation of Drying Times Based on Stain Type and Weather Conditions
The drying time of a deck stain can significantly vary depending on whether you’re using an oil-based or water-based stain.
- Oil-Based Stains: These typically take longer to dry, ranging from 24 to 48 hours. They penetrate deeper into the wood, providing robust protection but requiring more patience during the drying process.
- Water-Based Stains: These dry faster, often within 4 to 6 hours, because they sit on the surface of the wood rather than soaking in as deeply. They are more environmentally friendly and easier to clean up.
Weather conditions play a critical role in drying times as well.
- Temperature: Ideally, you should stain your deck when temperatures are between 10°C and 30°C (50°F to 85°F). Higher temperatures can cause the stain to dry too quickly, potentially leading to uneven coverage, while lower temperatures can prolong the drying time.
- Humidity: High humidity levels slow down the drying process. If possible, choose a day with low humidity to apply the stain.
- Sunlight: Direct sunlight can speed up drying times but might also cause the stain to dry too quickly and unevenly. It’s best to work in shaded areas or during cooler parts of the day to ensure even drying.
How to Protect Your Deck While It Dries
Once you’ve applied the stain, protecting your deck during the drying process is essential to prevent dust, leaves, and debris from ruining the finish. Here are some tips.
- Covering: Use a lightweight tarp or a canopy to cover the deck if there’s a risk of rain or strong winds. Ensure the cover is suspended above the deck and not in direct contact with the wet stain.
- Foot Traffic: Restrict access to the deck to avoid footprints or other marks. Consider placing temporary barriers or signs to alert others that the deck is off-limits during drying.
- Pets: Keep pets away from the deck as their nails can scratch the surface and their fur can get embedded in the wet stain.
Tips for Determining if the Deck is Fully Dry and Ready for Use
Knowing when your deck is completely dry and ready for use can sometimes be tricky, but these tips should help.
- Touch Test: Gently touch a small inconspicuous area of the deck with the back of your hand. If it feels tacky or leaves a residue, it needs more time to dry.
- Visual Inspection: Look for a uniform color and sheen across the deck surface. Any patches that appear glossy or wet indicate the stain hasn’t fully cured.
- Weather Considerations: If the weather has been consistently within the optimal range for drying, check after the recommended drying period based on the stain type. If there has been unexpected rain or high humidity, allow extra drying time.
By understanding and monitoring the drying and curing times of your deck stain, you can ensure a durable and attractive finish that will enhance the beauty and longevity of your deck. Take your time, be patient, and follow these guidelines to enjoy the best results.

Maintaining Your Stained Deck
Maintaining your stained deck is crucial to ensuring its longevity and keeping it looking great. Here are some detailed maintenance tips, guidelines on how often to reapply the stain, and seasonal tasks specifically tailored for the Australian climate.
Regular Maintenance Tips to Prolong the Life of the Stain
1. Clean Your Deck Regularly: Dirt, debris, and organic material can accumulate on your deck, leading to mildew and mold growth. Use a broom or a leaf blower to clear off leaves and dirt. For a deeper clean, use a mild detergent mixed with water and a soft-bristle brush to scrub the surface. Rinse thoroughly with a garden hose.
2. Inspect for Damage: Regularly check your deck for any signs of damage, such as cracks, splinters, or loose nails. Addressing these issues promptly can prevent further damage and maintain the integrity of your deck.
3. Protect from Furniture Scratches: Place pads or mats under furniture legs to prevent scratches and gouges. Avoid dragging heavy items across the deck surface to protect the stain.
4. Keep it Dry: Ensure that water does not pool on your deck by keeping the surface free of objects that can trap moisture. Redirect downspouts away from the deck and ensure proper drainage around the deck area.
How Often to Reapply the Stain
The frequency of reapplying stain depends on several factors, including the type of stain used, the level of exposure to the elements, and the amount of foot traffic your deck receives. Generally, a high-quality stain can last anywhere from two to three years. Here are some indicators that it might be time to reapply the stain.
1. Fading Color: If the color of your deck starts to look dull or faded, it’s a sign that the stain is wearing off and needs to be reapplied.
2. Water Beading: Stains help repel water. If water no longer beads on the surface and instead soaks into the wood, it’s time for a new coat of stain.
3. Visible Wear and Tear: High-traffic areas may show signs of wear sooner. If these areas look worn down compared to the rest of the deck, consider re-staining.
Seasonal Maintenance Tasks for Australian Climate
Australia’s diverse climate requires specific seasonal maintenance to ensure your deck remains in top condition throughout the year. Here’s a seasonal guide to deck maintenance.
Spring
- Deep Clean: As the weather warms up, give your deck a thorough cleaning to remove any grime accumulated over the winter.
- Inspect and Repair: Check for any winter damage and make necessary repairs. Pay close attention to any areas where water may have pooled and caused damage.
Summer
- Regular Sweeping: With increased outdoor activity, ensure you sweep your deck regularly to keep it free of dirt and debris.
- Shade Protection: If your deck is in direct sunlight, consider using outdoor rugs or shade structures to protect the wood from UV damage.
Autumn
- Leaf Removal: Fallen leaves can trap moisture and cause staining or mildew. Keep your deck clear of leaves and other debris.
- Check for Mold: Autumn’s damp conditions can lead to mold growth. Use a mild cleaner to remove any mold or mildew spots.
Winter
- Prevent Moisture Build-Up: Ensure your deck is free of snow and ice to prevent moisture damage. Use a plastic shovel to remove snow, as metal shovels can scratch the wood.
- Cover Furniture: Protect your outdoor furniture and any exposed deck areas by using covers to prevent moisture damage.
By following these regular and seasonal maintenance tips, you can extend the life of your deck stain, ensuring your deck remains a beautiful and functional outdoor space for years to come. Proper care and attention will not only maintain the aesthetic appeal of your deck but also protect your investment in the long run.

Common Mistakes To Avoid
Staining a deck can transform your outdoor space, but it’s crucial to avoid some common pitfalls to ensure a beautiful and long-lasting finish. Here are a few mistakes to watch out for.
Over-Staining or Under-Staining the Deck
Finding the right balance in applying stain is key. Over-staining occurs when too much product is applied, resulting in a sticky surface that never fully dries. This can lead to unsightly patches and potential peeling. On the other hand, under-staining happens when not enough stain is used, leaving the wood unprotected and prone to weather damage. The trick is to apply a thin, even coat, allowing it to penetrate the wood fully. If you need more coverage, it’s better to add a second coat rather than trying to do it all at once.
Not Allowing Enough Drying Time Between Coats
Patience is crucial when staining your deck. Each coat of stain needs adequate time to dry before applying the next one. Rushing this process can trap moisture between layers, leading to a blotchy finish and compromised durability. Typically, most stains require at least 24 hours of drying time, but it’s always best to check the manufacturer’s recommendations. Ensuring each layer is fully dry will result in a smooth, even finish that stands up to the elements.
Ignoring Weather Conditions Before Staining
Weather plays a significant role in the success of your deck staining project. It’s essential to choose a period when the weather is dry and mild. Avoid staining during rainy or extremely hot conditions, as these can prevent the stain from adhering properly or drying evenly. Ideally, you should have at least 48 hours of dry weather after staining to allow the product to cure completely. Monitoring the forecast and planning accordingly can save you from having to redo the job.
By steering clear of these common mistakes, you can ensure your deck looks stunning and stays protected for years to come. Remember, taking the time to do it right the first time is always worth the effort.

FAQs: About How To Stain A Deck AU
No, it’s essential to ensure your deck is completely dry before applying stain. Moisture in the wood can prevent the stain from penetrating properly and lead to uneven coverage and peeling.
The best time to stain a deck in Australia is during the dry seasons, typically late spring to early summer or early autumn. Avoid staining during the rainy season or on extremely hot days.
Oil-based stains penetrate deeper and offer longer-lasting protection, making them ideal for older decks. Water-based stains dry faster, have less odor, and are easier to clean up, making them a good choice for newer decks.
Typically, you should reapply deck stain every 2-3 years, depending on the type of stain used and the amount of exposure to weather and foot traffic. Regular maintenance checks can help determine when it’s time for a new coat.
Yes, but you need to ensure the old stain is in good condition. Clean the deck thoroughly and sand any areas where the old stain is peeling or flaking to ensure proper adhesion of the new stain.
You’ll need a deck cleaner, a power washer or hose, a sander, safety gear (gloves, mask, goggles), painter’s tape, drop cloths, brushes, rollers, and the stain of your choice.
Drying times vary depending on the type of stain and weather conditions. Generally, allow 24-48 hours for the stain to dry completely before walking on the deck or placing furniture on it.
Sanding your deck before staining is recommended, especially if the wood is rough or if there are remnants of old stain. Sanding ensures a smooth surface and better stain penetration.
If it rains shortly after staining, you might need to reapply the stain. Rain can wash away or dilute the stain, preventing it from setting properly. Always check the weather forecast before starting your project.
Regularly sweep and clean your deck to prevent dirt buildup. Check for and repair any damage promptly. Reapply a maintenance coat of stain as needed, usually every 2-3 years, to keep your deck looking its best and protected from the elements.
Conclusion
In conclusion, we’ve covered all the essential steps and tips for staining a deck in Australia, ensuring that your project is set up for success. From selecting the right stain to preparing the deck surface and applying the stain correctly, these guidelines will help you achieve a professional finish. We encourage you to start your staining project with confidence, knowing you have the knowledge and tools to do it right. Don’t hesitate to share your own tips and experiences in the comments below—your insights could be invaluable to fellow readers embarking on their own deck staining journeys.
About the Author:
Mike Veail is a recognized digital marketing expert with over 6 years of experience in helping tradespeople and small businesses thrive online. A former quantity surveyor, Mike combines deep industry knowledge with hands-on expertise in SEO and Google Ads. His marketing strategies are tailored to the specific needs of the trades sector, helping businesses increase visibility and generate more leads through proven, ethical methods.
Mike has successfully partnered with numerous companies, establishing a track record of delivering measurable results. His work has been featured across various platforms that showcase his expertise in lead generation and online marketing for the trades sector.
Learn more about Mike's experience and services at https://theleadguy.online or follow him on social media: